Vehicle Creation: Difference between revisions
(Created page with 'A quick step-by-step guide to turning a Sketchup model into a Darkwind model. This isn't very detailed, because I'm not an expert in Blender, so you probably don't want to learn…') |
|||
| Line 26: | Line 26: | ||
===== Our Example ===== | ===== Our Example ===== | ||
For this tutorial, I'll be using this [http://sketchup.google.com/3dwarehouse/details?mid=e646866ff6a7eabd8869daa461a34b2&prevstart=0 Chevy Suburban], spotted by Knight. This passes pretty much all the tests above, except possibly being a bit close to an Apache. I suspect the differences are enough though. When there are multiple options, you want to download the model in | For this tutorial, I'll be using this [http://sketchup.google.com/3dwarehouse/details?mid=e646866ff6a7eabd8869daa461a34b2&prevstart=0 Chevy Suburban], spotted by Knight. This passes pretty much all the tests above, except possibly being a bit close to an Apache. I suspect the differences are enough though. When there are multiple options, you want to download the model in the newest sketchup format. | ||
===Stripping=== | ===Stripping=== | ||
Revision as of 12:04, 7 March 2010
A quick step-by-step guide to turning a Sketchup model into a Darkwind model. This isn't very detailed, because I'm not an expert in Blender, so you probably don't want to learn my bad habits anyway. Also you may prefer to use another 3D modelling package, in which case detailed instructions won't be much use to you. Either way you need to learn (or know) how to use a 3D modelling package before we start. I picked up enough blender to be useful in a few evenings of following tutorials, so it's not a huge issue. All the tools we'll be using here are free, so that's no barrier either.
Software
You will need:
Blender - or your preferred modelling software. It needs to be able to import Collada format models (.dae) and export Wavefront objects (.obj).
Sketchup, Google's free modelling program.
First, Catch Your Model
You'll need to find the model you want to convert on sketchup. Have a look through the 3D Warehouse. There are a few things to take into consideration:
Technical
- Is the model too detailed? Check the download size, anything over 5Mb is probably off limits. If the model is "tuned" (spit), try and find the original.
- Can Darkwind support it? Four wheelers with enclosed cabins only.
- Is it possible to texture it? We'll look into this in detail later, but for now the closer to a simple cube it is, the better.
- Is it legal? Models on sketchup can be used for pretty much anything, but I'd steer clear of anything with comments like "found on the web", or anything ripped from another game (obviously).
Aesthetic
This is more about whether your model will ever make it into the game. Making something that fits with sam's vision of the world gives you a much better chance. I'd avoid one-offs, made up cars or kit cars. Modern cars are lower priority than 60s and 70s style, and anything unusual tends to be better. There are any number of 70s muscle cars, for example, but I haven't bothered converting any because there are so many in the game already. Except for the Capri, obviously. I never said I followed all the rules :)
Our Example
For this tutorial, I'll be using this Chevy Suburban, spotted by Knight. This passes pretty much all the tests above, except possibly being a bit close to an Apache. I suspect the differences are enough though. When there are multiple options, you want to download the model in the newest sketchup format.
Stripping
There are two main steps to take us from a Sketchup model to a Darkwind model. We need to reduce the poly count to 1500 from whatever it starts at (often 20000 or more), and then we need to texture it with a single 512x512 texture. To start with, we'll reduce the poly count as much as possible by deleting everything we don't need from the model.
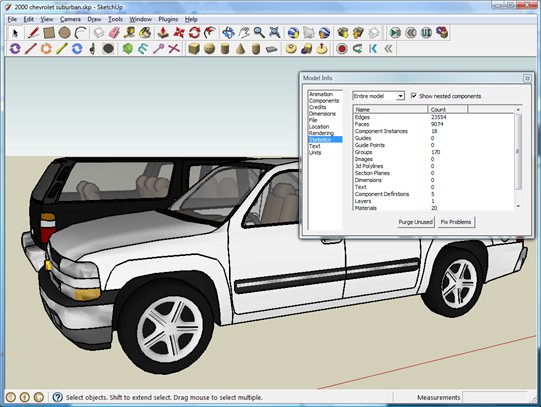
Download the model, and open it in sketchup. Select Window->Model Info from the menu to see the poly count. Currently it's 9074 (this is not accurate for a variety of reasons, but it's a reasonable estimate). Given we have two models, that's very low - I've chosen an easy example for this tutorial. Anything up to 40000 or so is possible, but try and find something easy for your first model.
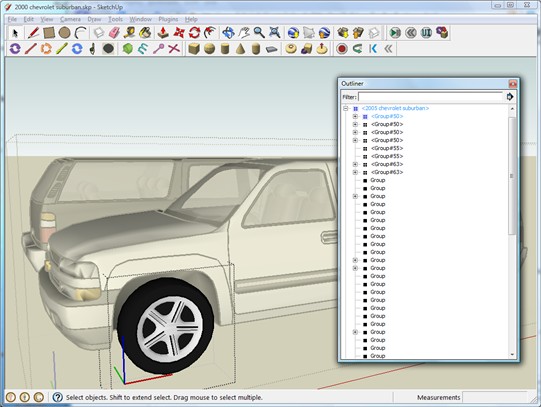
Now select Outliner from the Window menu. This lists all the separate objects in the model. Click on one and it will be outlined in blue. Click again and everything else greys out, so we can see exactly what we're doing. Click it again to go back to normal editing.
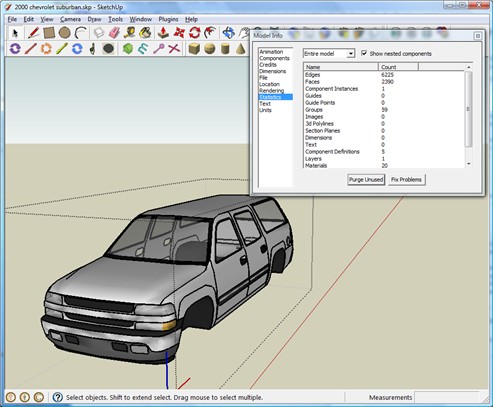
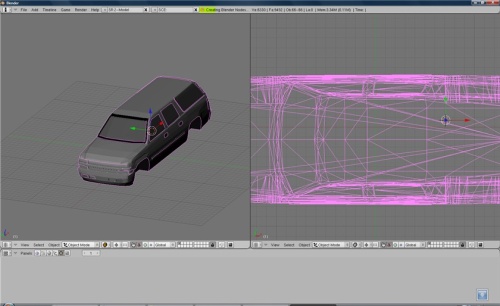
Obviously the first thing we need to do is delete one of the suburbans. It looks like they're supposed to be different model years, but I really can't tell the difference, so we'll delete the black one because white models are easier to work with. Just select it in the outliner and hit delete. Next we'll go through and remove what we can. Wheels aren't needed, and most of the lights and things can go too, along with the interior. You can either select them from the model (double click to get into groups and select individual components), or go down the outliner and check each group in turn. Hiding bits of the outside (from the right click menu) can help you get at the inside. Once you've finished deleting, your model should look something like this:
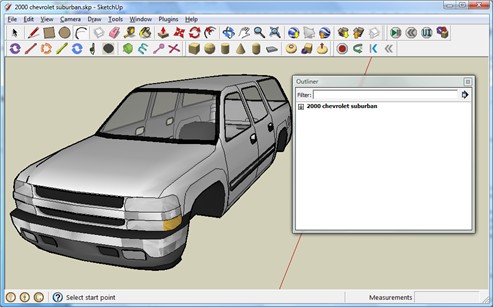
Now that we've got rid of everything we can, it's time to export to blender for the more detailed work. Select everything on the outliner, right click and choose "explode". This may take several minutes, so be patient. If there's anything left, explode it again. Keep going until the outliner just has one thing in it:
Now select Export->3D Model from the file menu, and export the model. That's it for Sketchup, so feel free to close it and open up Blender.
Will It Blend?
To import the model into Blender, go to File->Import, and choose Collada 1.4(dae). The import dialogue will appear in one of the windows - if it's too small to see, ctrl-up will maximise the window. Choose the file you want to import, press the "New Scenes" button, then press "Import and Close". You should see your model appear after a short pause. If you don't it may be too big to see - press a, then s, then move the mouse until it appears and press the left button. You may need to change which scene you are looking at too. Next, clear the parenting information (Alt-P, then choose "clear track"). This avoids some problems with rescaling parts of the object.
You can see the current poly count in the top bar. Right now it's 9492 in my version, and we need to get it below 1500. You're mostly on your own here, but there are a few tricks I've found along the way.
More Deletions
You should find the model is grouped into objects. There are usually more objects here than in Sketchup for some reason. Delete everything you don't need. As with sketchup, hiding things temporarily helps you get at the inside. You could also try hiding everything you want, then deleting what's left. Make sure to remove all of the interior - we don't need it, so it's all wasted space.
Double Skins
The export from Sketchup makes everything double sided, which means we have twice as many faces as we need. Sometimes you can select these by material, and sometimes you just have to use the remove doubles tool, then clear up the mess afterwards - make sure you're in texture mode so you can see which faces are flipped the wrong way. Auto recalculating normals (ctrl-N) works pretty well for simple objects.
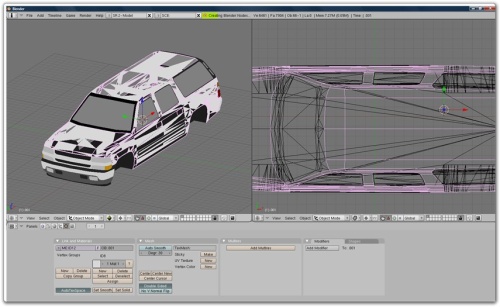 Removing doubles leaves half the faces flipped the wrong way
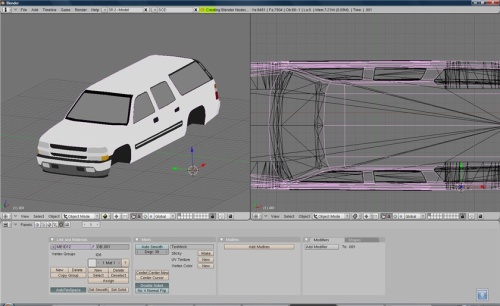 Recalculating normals fixes it nicely
Window Cleaning
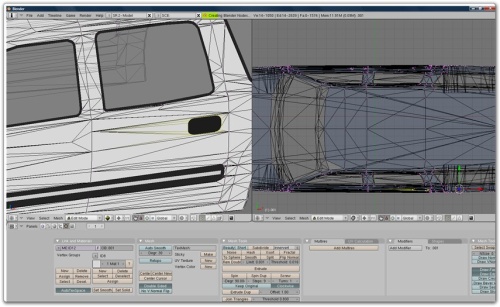
Remove anything that would look just as good painted on - especially logos. Windows etc. are better as part of the texture, because it makes it easier for artists to modify later. Here I'm stripping out the door handles by merging the vertices (w->merge->at centre).
Auto Reduction
There are two ways to automatically reduce the poly count. One is easy to use but gives pretty bad results - Mesh->Poly Reducer from the scripts window. I used this on some of the earlier models, but I try to keep it as a last resort now, because the results tend to be ugly. The nicer way is the decimate modifier. Because it's a modifier you don't lose data, so you can add modifiers to each object separately until you get the poly count you want, then apply them all. The only problem with decimate is that it only works on manifold objects - that is, simple closed surfaces with no holes in. You can use ctrl-alt-shift-M to select non-manifold vertices, which helps a bit, but it's still a pain. The results are good though. You'll probably have to join all your objects together to do this, so save first.
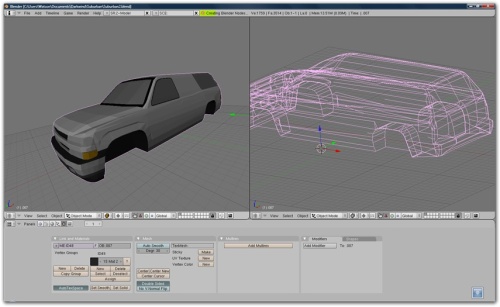 Manual cleanup gets us to 3500 faces. I got bored removing the windows, but decimate should do a pretty good job
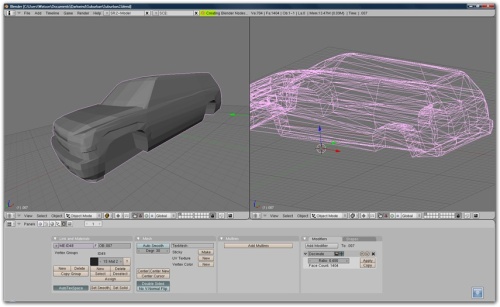 Decimate modifier does the rest
If you have a more complex model, you could try decimating the individual pieces, which should let you adjust where you want more detail. I just finished a model where 1/3 of all the faces were in the wing mirrors, which is not ideal.
Tidying Up
Once you're close to 1500 polys, you also need to make sure your model is clean. By this I mean there should be no holes, no stray edges or faces, and no weird geometry (infinitely thin edges, etc.). If you used a decimate modifier you're probably nearly there anyway. It's up to you how far you go with this, but it'll make the texturing easier. Once you've finished, save to a new file (because the next bit is irreversable) and apply all your decimate modifiers. Then select all objects and join them together. You should have a single object consisting of a single closed surface. With that done, it's time to start skinning.
